Difference between revisions of "Alternator Removal & Replacement"
| Line 6: | Line 6: | ||
| − | [[Image: | + | |
| + | |||
| + | |||
| + | 2. Unbolt the wire on the back of the alternator | ||
| + | a. Be careful not to drop the bolt, because it’ll land on top of the brush guard. | ||
| + | |||
| + | |||
| + | 3. Unhook the white plug on the back of the alternator. | ||
| + | b. It is on the Driver’s side of the alternator | ||
| + | c. The plug pulls straight out (toward the Driver’s side) | ||
| + | -- Pull the clip holding the plug in toward the front of the Eagle | ||
| + | |||
| + | |||
| + | 4. Take out the bottom bolt | ||
| + | a. 15 mm deep socket needed | ||
| + | b. Be careful not to drop the bolt – It’ll land on top of the brush guard, which is difficult to reach | ||
| + | |||
| + | 5. Take out the top bolt | ||
| + | a. Make sure the handle of your socket wrench is pointing toward the ground, or else you won’t have enough room to turn the wrench | ||
| + | b. 15 mm socket wrench needed | ||
| + | |||
| + | |||
| + | [[Image:alt02.jpg|center]] | ||
Revision as of 01:44, 15 November 2009
AMC Eagle 258 Alternator replacement (with AC)
by AMC Eagle Nest member 83Eagle!
1. Unhook the Positive (+) Terminal on the battery
2. Unbolt the wire on the back of the alternator a. Be careful not to drop the bolt, because it’ll land on top of the brush guard.
3. Unhook the white plug on the back of the alternator.
b. It is on the Driver’s side of the alternator
c. The plug pulls straight out (toward the Driver’s side)
-- Pull the clip holding the plug in toward the front of the Eagle
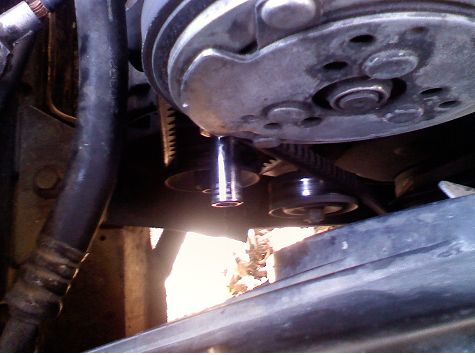
4. Take out the bottom bolt
a. 15 mm deep socket needed
b. Be careful not to drop the bolt – It’ll land on top of the brush guard, which is difficult to reach
5. Take out the top bolt a. Make sure the handle of your socket wrench is pointing toward the ground, or else you won’t have enough room to turn the wrench b. 15 mm socket wrench needed
